While building out a few Team-Call Groups for a customer using CloudPBX in Skype for Business Online, we ran into an issue handling voicemail messages using Inbox/Email Rules. The request was for all voicemail messages and missed call notifications to be forwarded to the members in the Team-Call Group.
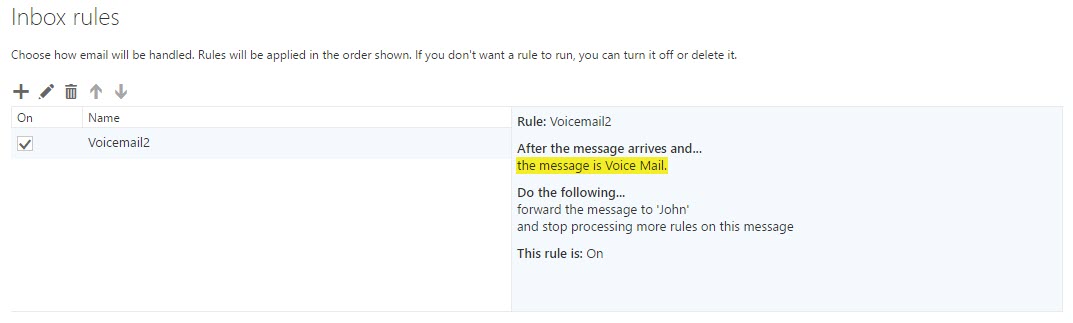
Simple enough, fire up Outlook create an Inbox rule forwarding all messages to the agents. Well, that worked for emails but not voicemail.
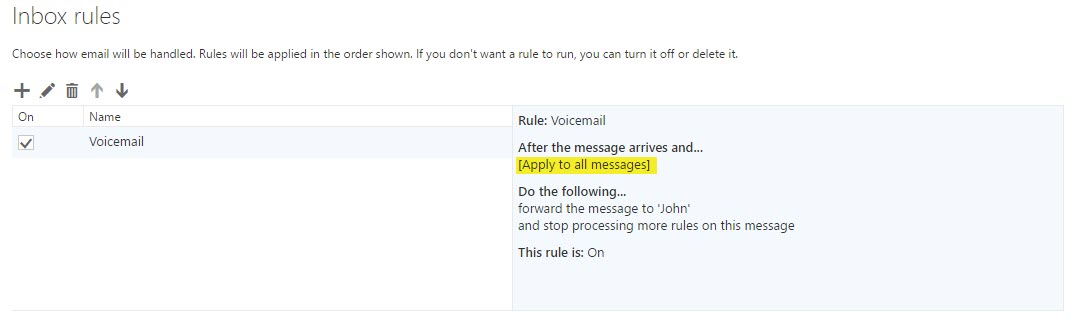
What if the rule is modified to have a condition of “It’s of the type….” “voice mail”? No luck.
If we take a step back and think about what is going on. We know that CloudPBX does not use Exchange Unified Messaging for voicemail, but a new Azure Voicemail service. Information on Azure Voicemail can be found at:
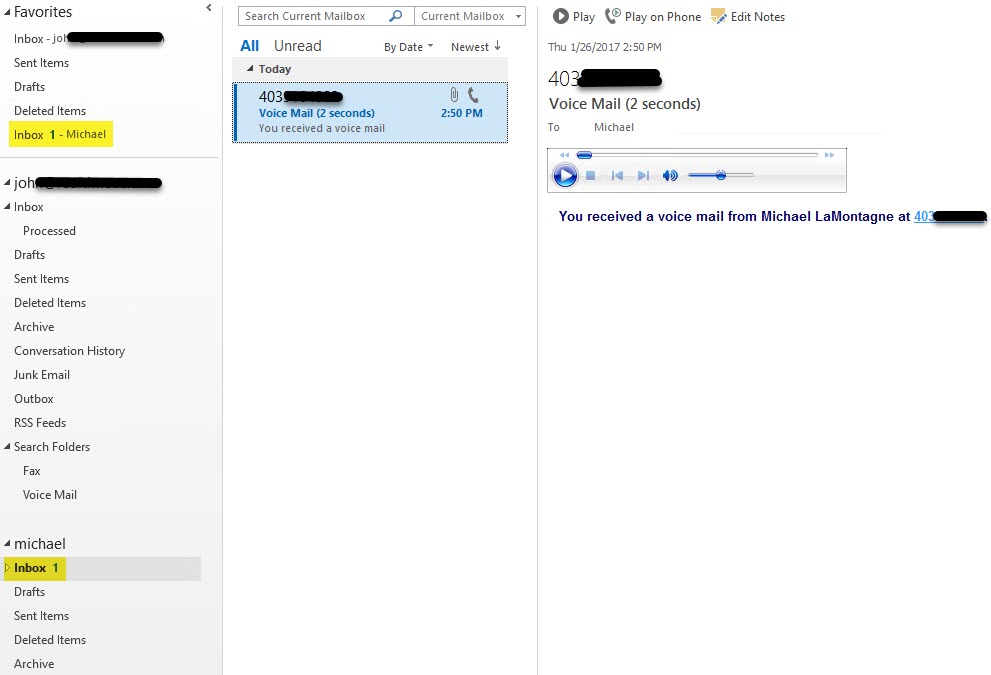
Azure Voicemail is using Autodiscover, OAuth and EWS to deposit messages directly into the user’s mailbox and would only use SMTP to resend a message to the mailbox in the case of a failure. Being how voicemails are placed instead of sent, the Inbox rules never trigger. I remember running into this long ago with Cisco Unity voicemail and Exchange.
Workaround 1: Leverage mailbox delegation. Agents could access the Team-Call group’s mailbox in both Outlook and OWA. Which could allow for easier voicemail processing. The first agent to access the message, would cause the message to be read and could move it to a processed folder once dealt with. Unfortunately this was not the workflow the customer wanted.
Workaround 2: My first thought was create a PowerShell script to query the mailbox using EWS and forward the messages along to the agents. Some Google-fu and found: https://seanonit.wordpress.com/2014/10/29/using-powershell-and-ews-to-monitor-a-mailbox/. That lasted about a minute before Azure popped in my mind.
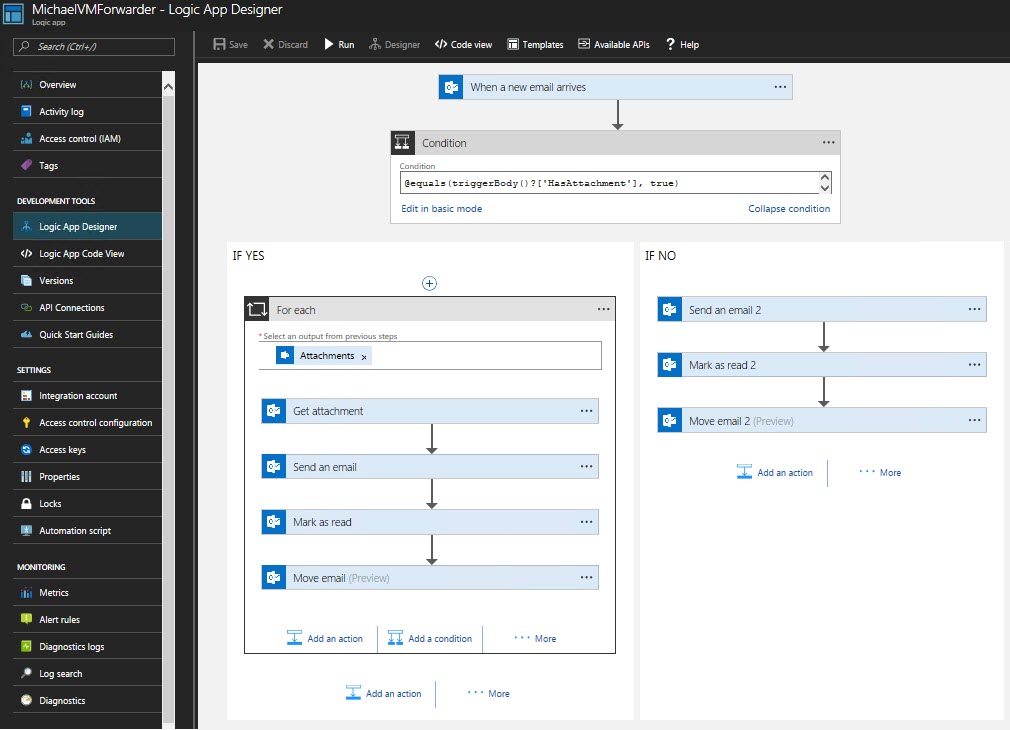
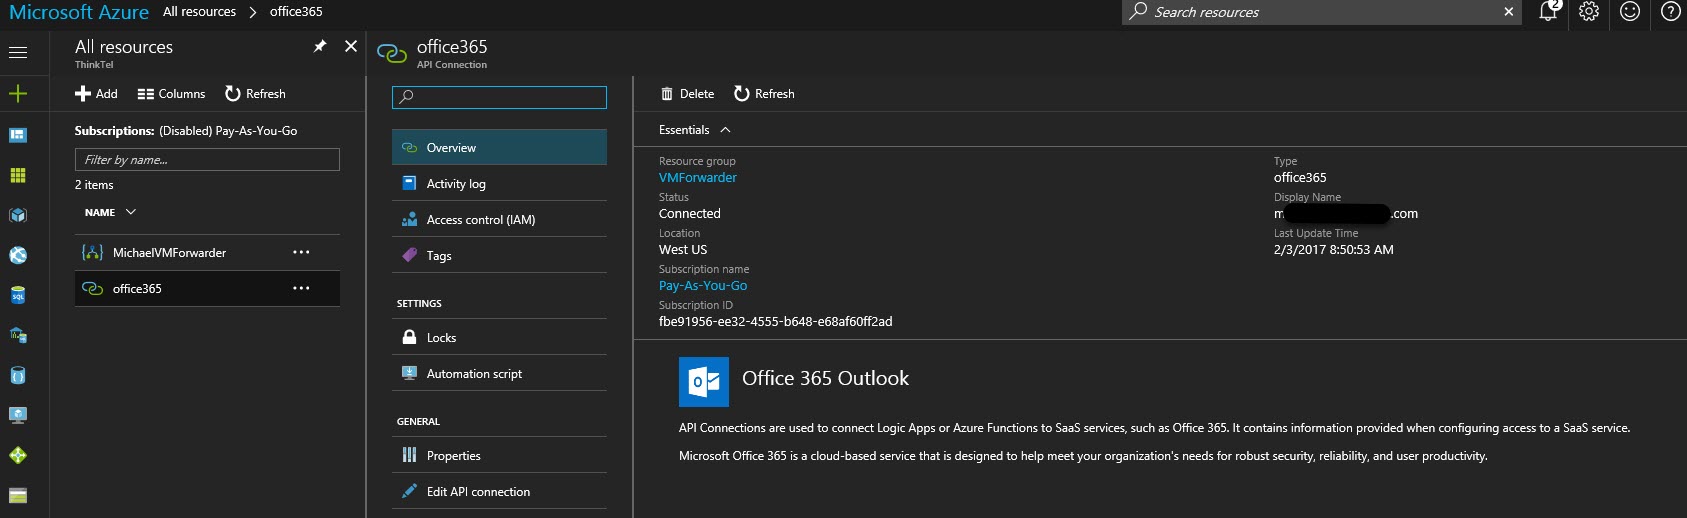
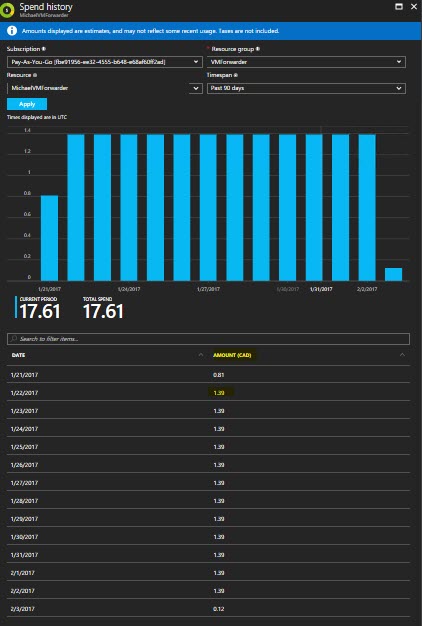
Workaround 3: Bring a gun to a knife fight (Azure Logic App). Armed with some Azure credits, I fired up the Logic App Designer and quickly figured out this was going to be a little more work than I had hoped. Not sure why, but there isn’t a simple template to read new emails and forward… Basically you need to check if the new email has an attachment or not and process it differently. Logic Apps are very unforgiving and you need to account for every scenario. I’m not ashamed to admit it, building such simple logic took me hours! What I wasn’t expecting was this little Logic App with an Office365 API Connection to cost a buck a day. I needed to create about 10 of these, so this wasn’t going to scale even with CSP pricing.
Workaround 4: Microsoft Flow ( https://flow.microsoft.com/en-us/). I was pleasantly surprised to find that Flow was pretty much identical to the Logic App I built.
Flow is included in the following Office 365 plans:
- Office 365 Business Essentials
- Office 365 Business Premium
- Office 365 Education
- Office 365 Education Plus
- Office 365 Enterprise E1
- Office 365 Enterprise E3
- Office 365 Enterprise E5
Flow Plan Features:
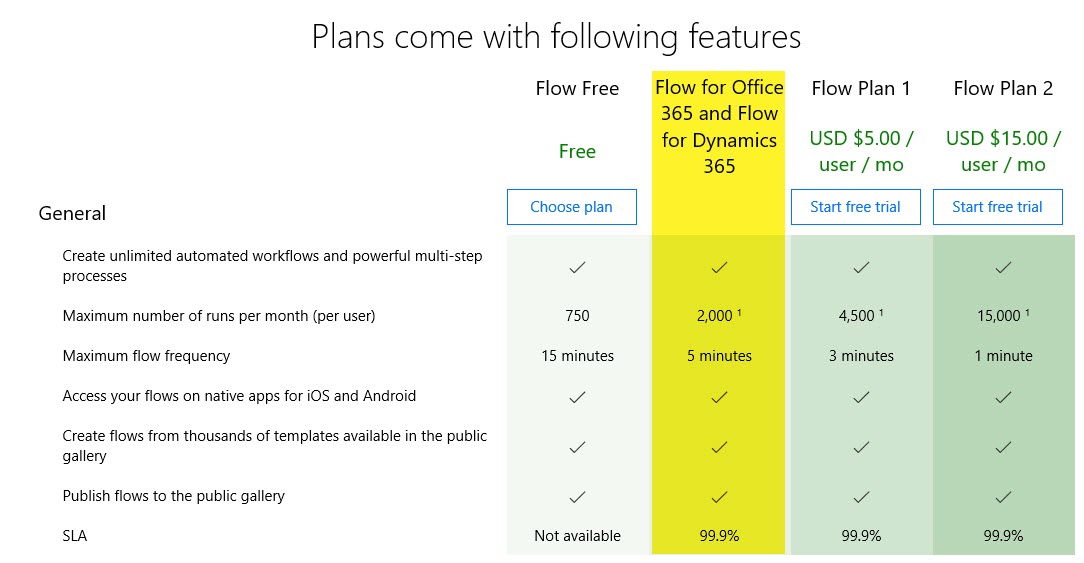
Basically the including version of Flow in Office 365 worked for my needs. If I needed to bump up the plan, it was still cheaper than Azure Logic App doing the same task.
Steps to build Flow to process Azure Voicemail: Updated flow with import package found at: Azure Voicemail with Flow
- Click on the “Flow” tile in Office 365 portal while signed in with Team-Call Group account
- Click “My flows”
- Click “Create from blank”
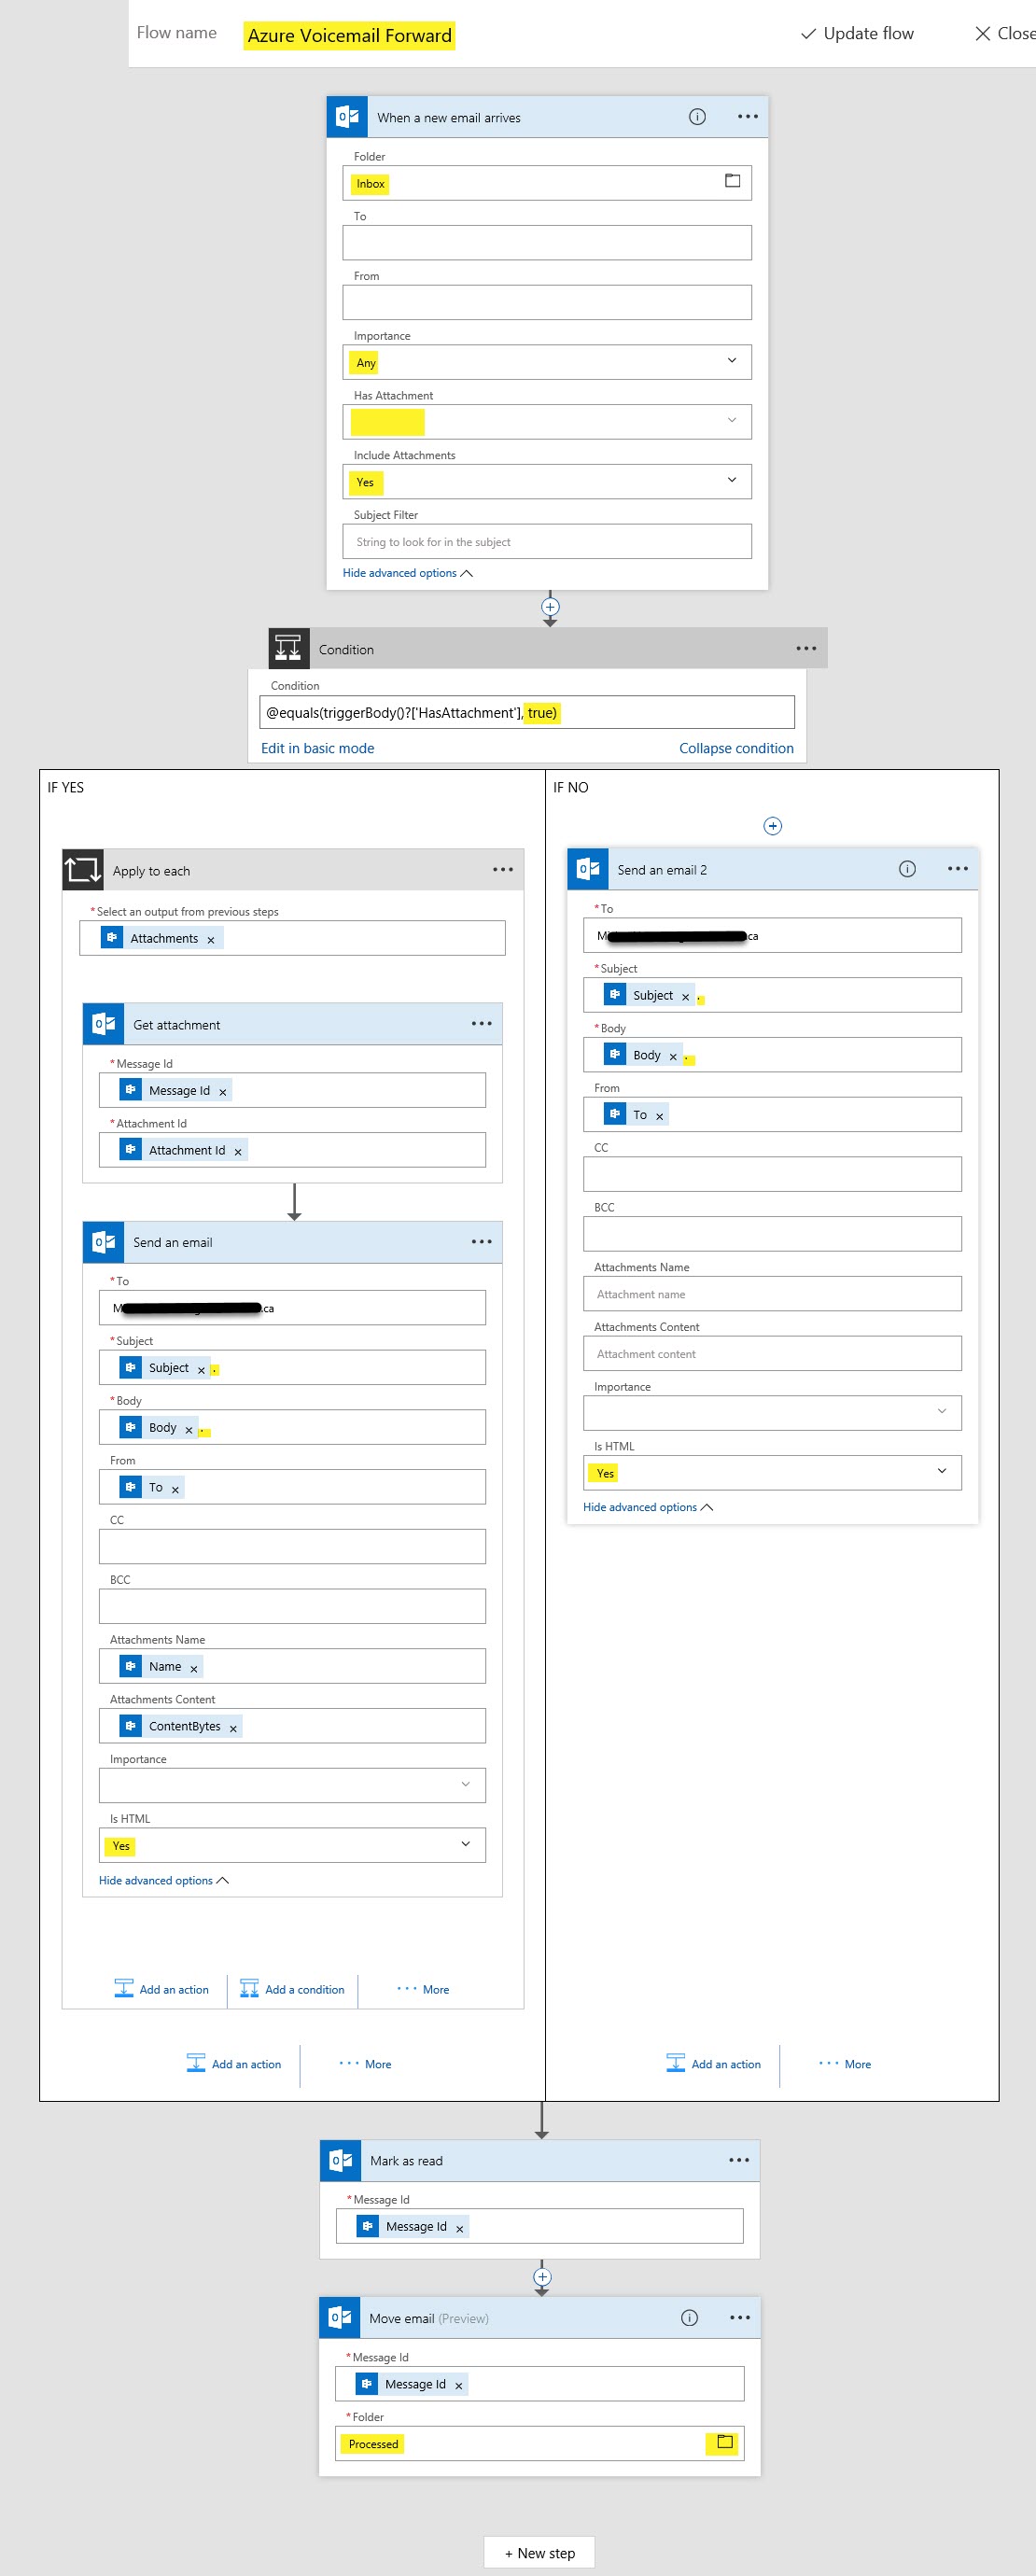
- Flow name: “Azure Voicemail Forward”
- Services: “Office 365 Outlook”
- Triggers: “Office 365 Outlook - When a new email arrives”
- Click “…”, look at “My Connections”, should show mailbox where Azure Voicemail will deposit from CloudPBX
- Folder: “Inbox”
- Click “Show advanced options”
- Importance: “Any”
- Has Attachment: “blank”
- Include Attachments: “Yes”
- Triggers: “Office 365 Outlook - When a new email arrives”
- Click “+ New Step”, Click “Add a condition”
- Object Name: “Has Attachment”
- Relationship: “is equal to”
- Value: “true”
- Click “Edit in advanced mode”, remove any quotes around true, Condition should look like: @equals(triggerBody()?[‘HasAttachment’], true)
- Under “IF YES, DO NOTHING”, Click “… More”, Click “Add an apply to each”
- Select an output from previous steps: “Attachments” (Click “See more” if not shown in list)
- Click “Add an action”, within same step
- Services: “Office 365 Outlook”
- Actions: “Office 365 Outlook - Get-Attachment”
- Message Id: “Message id” (Click “See more” if not shown in list)
- Attachment Id: “Attachment Id” (Click “See more” if not shown in list)
- Actions: “Office 365 Outlook - Get-Attachment”
- Services: “Office 365 Outlook”
- Click “Add an action”, within same step
- Services: “Office 365 Outlook” * Actions: “Office 365 Outlook - Send an Email” * Click “Show advanced options” * To: Enter in Destination email addresses * Subject: “Subject”, also type some text like “.” (Flow will fail if Subject is blank) * Body: “Body” (use “Body” from “When a new email arrives” and not the one under “Get Attachment”), also type some text like “.” (Flow will fail if Body is blank) * From: “To” * Attachment Name: “Name” * Attachment Content: “Content” (I’ve seen “Content” switch to “ContentBytes”, both work) * Is HTML: “Yes”
- Click “+ New Step”, Click “Add an action”
- Services: “Office 365 Outlook”
- Actions: “Office 365 Outlook - Mark as read”
- Message ID: “Message ID” (Click “See more” if not shown in list)
- Actions: “Office 365 Outlook - Mark as read”
- Services: “Office 365 Outlook”
- Click “+ New Step”, Click “Add an action”
- Services: “Office 365 Outlook”
- Actions: “Office 365 Outlook - Move Email”
- Message ID: “Message ID” (Click “See more” if not shown in list)
- Folder: “Processed” (make sure to Create a matching folder in Team-Call Group’s mailbox)
- Actions: “Office 365 Outlook - Move Email”
- Services: “Office 365 Outlook”
- Click on “Condition” again, Under “IF NO, DO NOTHING”, Click “Add an action”
- Services: “Office 365 Outlook”
- Actions: “Office 365 Outlook - Send an Email”
- Click “Show advanced options”
- To: Enter in Destination email addresses
- Subject: “Subject”, also type some text like “.” (Flow will fail if Subject is blank)
- Body: “Body” (use “Body” from “When a new email arrives” and not the one under “Get Attachment”), also type some text like “.” (Flow will fail if Body is blank)
- From: “To”
- Is HTML: “Yes”
- Actions: “Office 365 Outlook - Send an Email”
- Services: “Office 365 Outlook”
- Click “Create Flow”
- Click “Done”
- Click “Manage”
- Click “I” button on new Flow (Monitor Flow Runs)
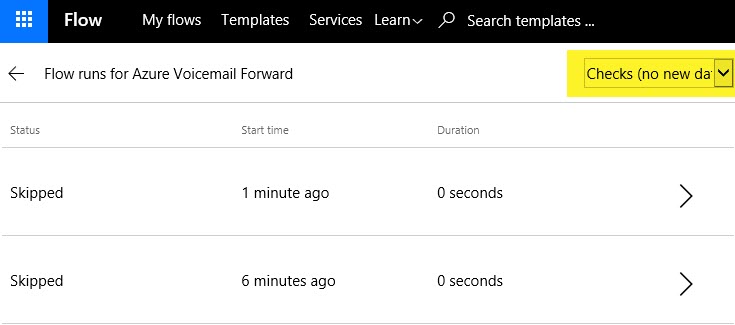
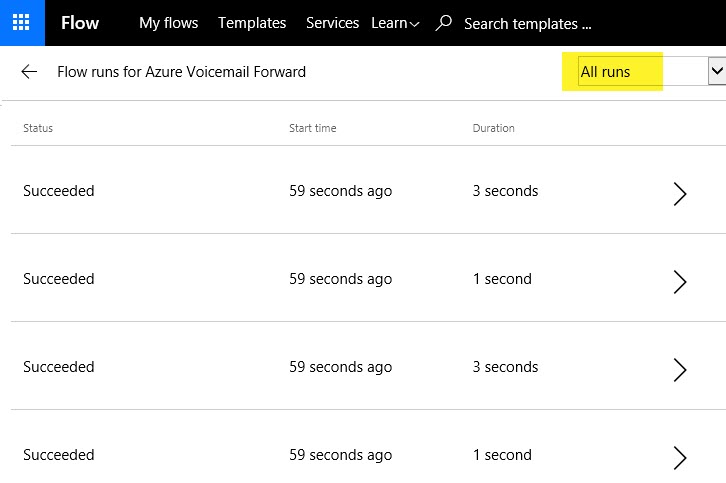
- Test: Wait until first run of Flow is complete, look under: “Checks (no new data)”, Leave Voicemail and Missed Call for Team-Call Group, look under: “All runs”